
By the end of this article, you’re going to learn how to design your business card to:
* Customize your business card exactly the way you want it.
* Save time: Real time proofing, no waiting for your designer’s proof.
* Save you money on design charges if you were to hire someone to design your Business Card.
COLOR RIGHT NOW ARE EXPERTS IN HELPING OUR CLIENTS IN DESIGN.
Check out our many posts on how to design your own print materials using several different free online software available to the public. Be a part of the new online community of designers of print media using our fast and easy 5 step process.
WHY WE CHOSE GIMP
There are over 30 free online software for design purposes and we have tested all and have chosen GIMP as one of our top recommended softwares for these three reasons.
* GIMP makes graphic design simple and accessible.
* Unlike other software, GIMP is user friendly and very intuitive.
* With GIMP drag and drop features, it is very easy to use.
GETTING STARTED
You will have to have a GIMP account to start designing. The software is free, click here to make your GIMP account.

STEP 1: START A NEW PROJECT
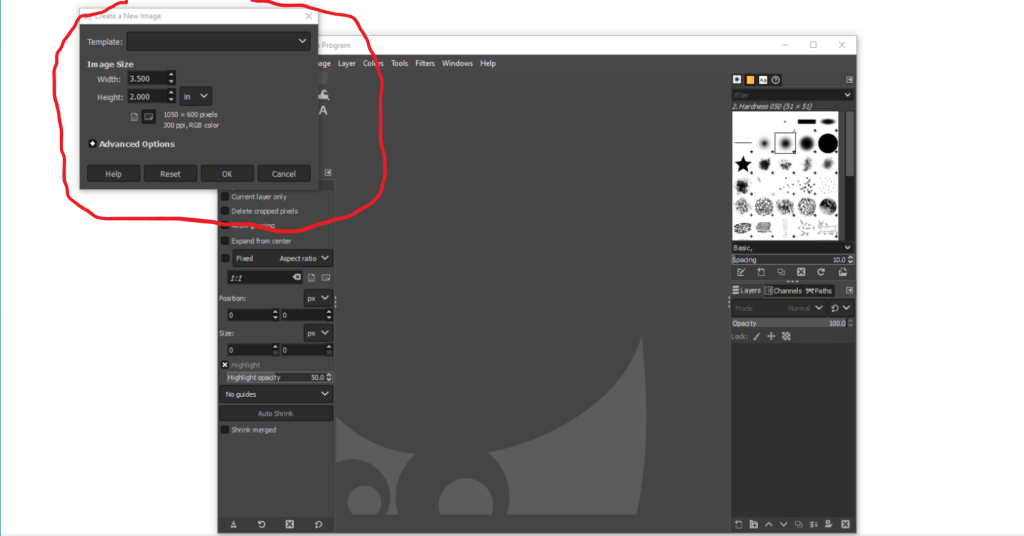
This program does not have a blank premade template for business cards, so the standard size of business cards size is 3.5 inches by 2 inches. Go to file, “New Image”, then fill in the size. Click “OK”
STEP 2: TOOLS FOR DESIGN
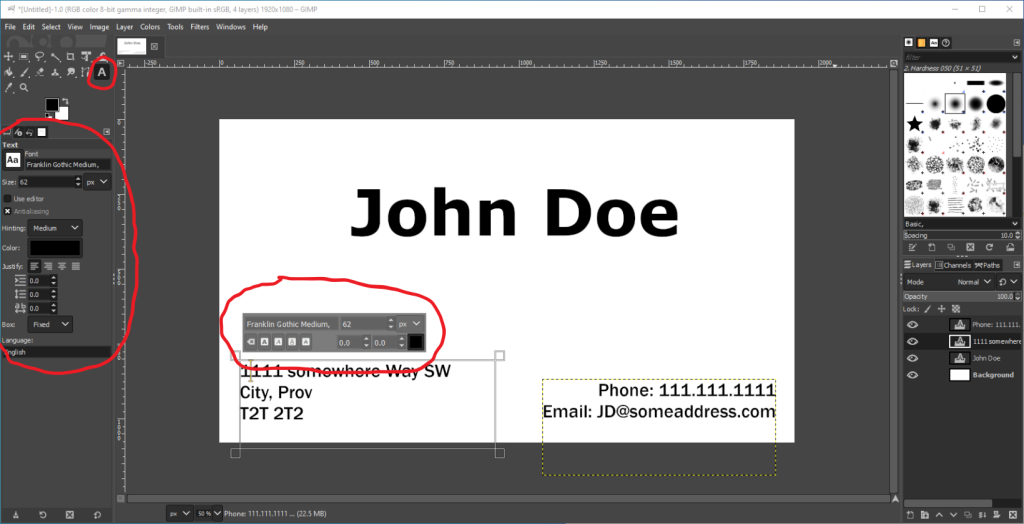
At the top, left corner is all the tools you need to make a business card. For these instructions, just use the basics (text tool)
Type tool: Drag your cursor to make a text box, then type. Easy right? When finished the will be two options windows for you to change the style/size/alignment/color) of the type. The one difference I notice in this program is the font styles. you need to click the font style button to get a drop-down menu of all the fonts.
Tip: For Best results:
- Need some ideas of creative simple business cards. Check out, this Forbes Blog on Business Cards inspiration.
STEP 3: DONT FORGET ABOUT THE SPACING
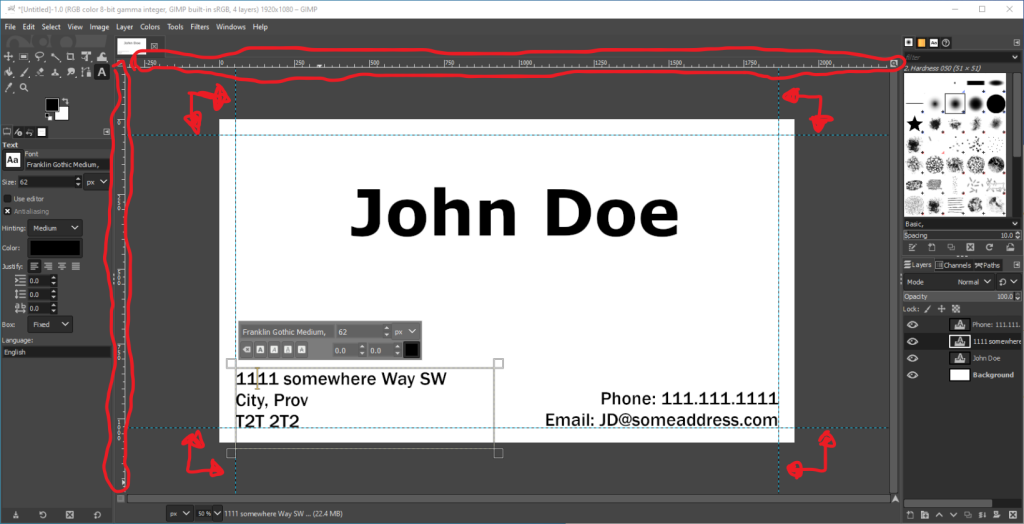
The GIMP Program has a ruler to help with spacing. The best measurement for spacing is 0.125 inches away from the edge of the artwork. To get these Rulers/guidelines click on the side of the window that visibly shows the ruler, and drag toward the artboard.
STEP 4: SAVE AND DOWNLOAD YOUR FILE
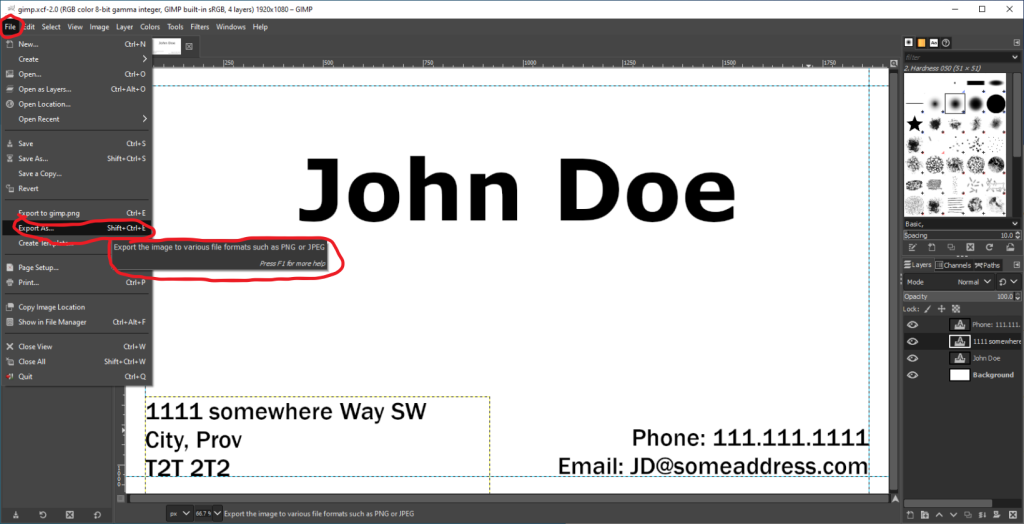
Now that you’ve finished designing your Business Card, all you need to do is save it in the correct format and send it off to us when you place your order. Follow the steps below to make sure your design comes to us ready for printing!
Tip: For Best results:
- Click the “File” at the top right of your screen
- Click “Export” from the drop-down menu that appears
- Select “PNG” under “File Type”
- Hit the “OK” button at the bottom, and save your file to your computer
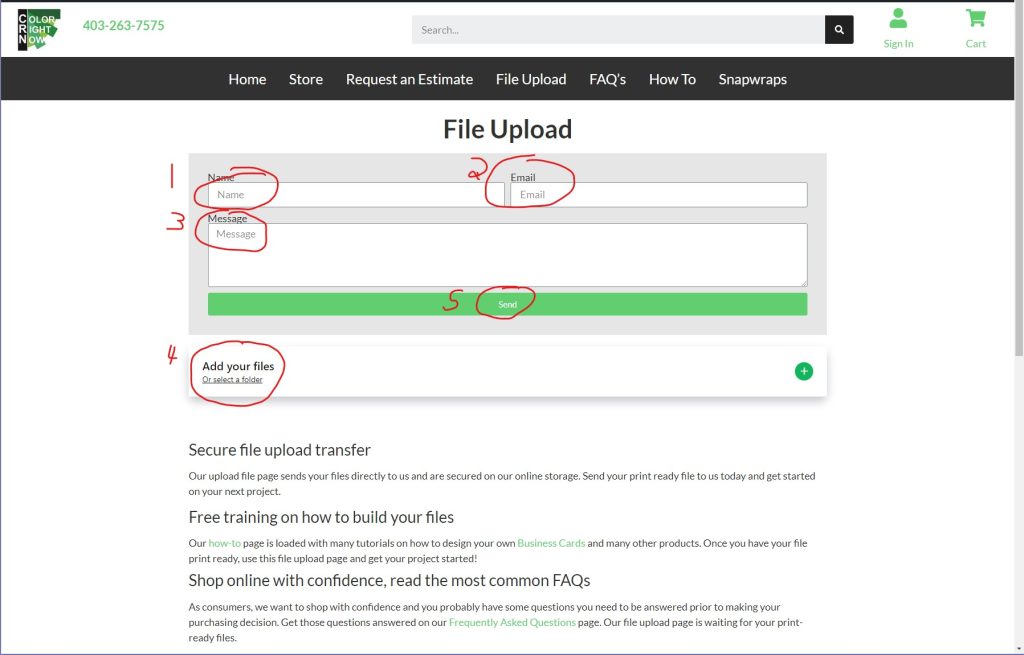
STEP 5: SEND US YOUR FILE TO PRINT
It’s now time to get your design printed putting ink on paper!
Send us your file and we will get started today!
EASY AND FREE, THAT IS HOW TO DESIGN A BUSINESS CARD USING GIMP
Feel free to leave comments about this tutorial on our homepage located at the bottom
DO YOU HAVE DESIGNING QUESTIONS?
This is an easy 5 step quick process to help you design your on art. You may have some unanswered design questions, see our Frequently Asked Questions page for many helpful tips.